USB debugging for Android device
This tutorial will explain how to put your Android device in USB Debugging mode.We have 8 easy steps to accomplish that.
1. First of all you should install Android SDK, so please go on and install it.
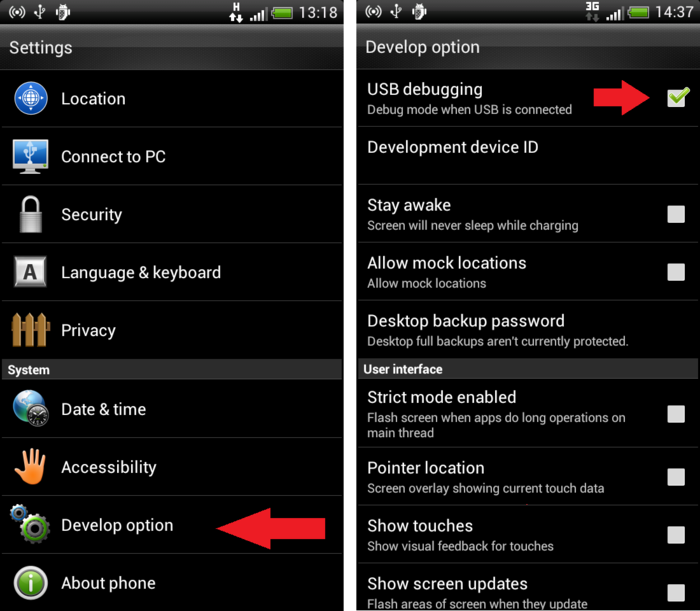
2. Plug in your Android device. Tap on Settings -> Develop Option and enable the USB Debugging.
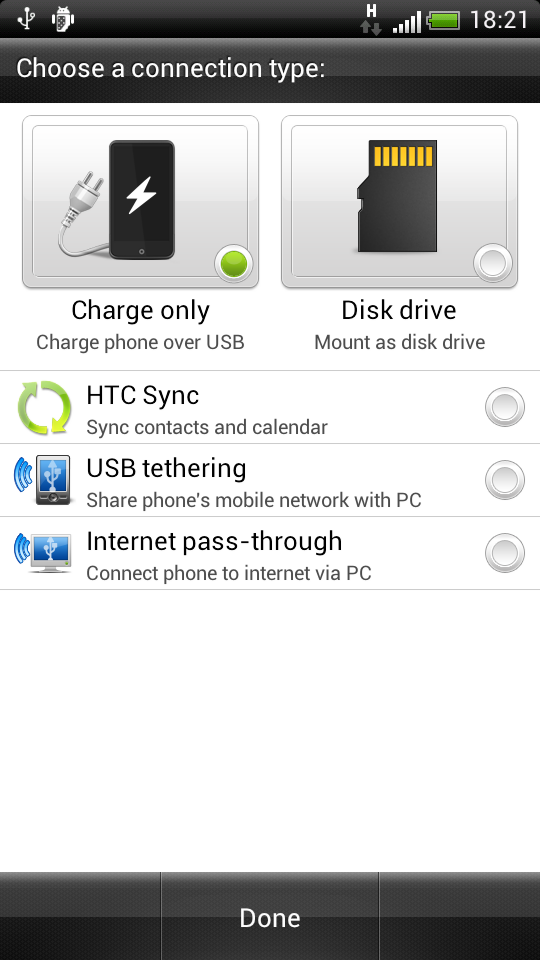
3. Make sure that your USB connection is NOT set to “Internet pass through”. If that’s the case your won’t be able to debug it. Just to make sure set the phone to charge only when connected to the computer.
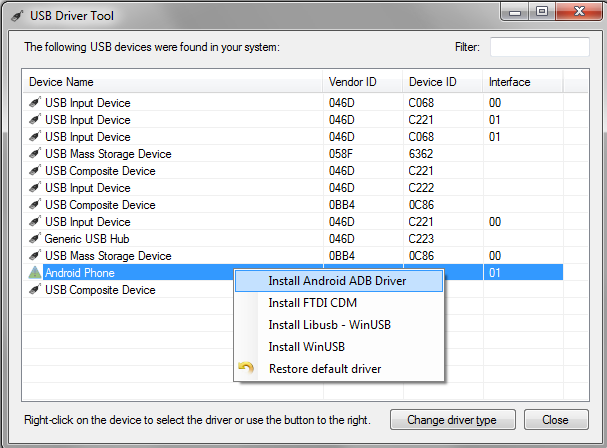
4. Install the USB Driver tool suitable for your phone. You can download the driver from HERE.
5. You can now select your device from the list, right click on it and select “Install Android Driver”.
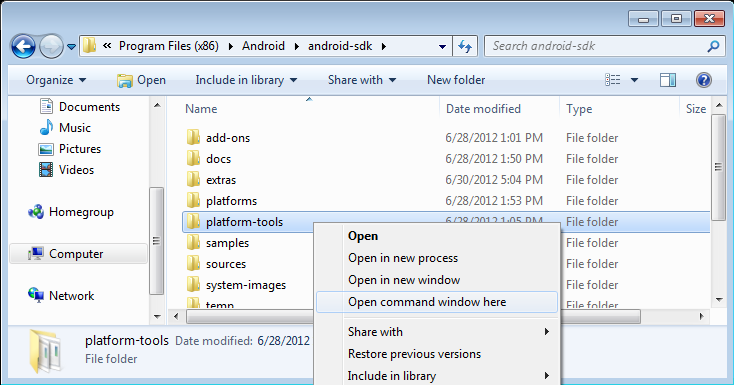
6. Now you can start to test your driver. Just go to Android SDK directory located on []:\Program Files (x86)\Android\android-sdk.
7. Now you have to hold the Shift button and right-click on the platform-tools folder in the explorer. Just select “Open command window here” from the menu. Please make sure you keep the SHIFT key pressed, otherwise the “Open command window here” option won’t appear on the menu.
8. Type “adb devices” in the command window.
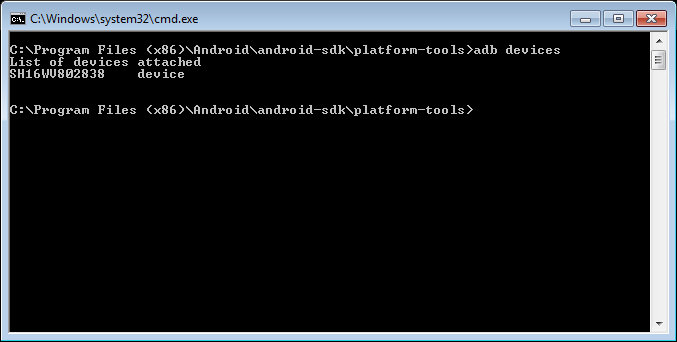
If everything was correctly installed you will see your device in that window.
Recent Comments