How to make an USB Bootable? (5 Methods)
Learn 5 methods to make an bootable USB!
Do you have an USB that you still don’t use it? Now it’s the time to find a utility for your USB. An operating system install drive for your Windows, UNIX and Mac Systems, or even as a diagnostic tool for you desktop or laptop may be the solution. How to ? You can find a complete step-by-step tutorial below, so be patient and stay close!
1st Method: Install Any Operating System on your Personal Computer, using your USB Flash Drive
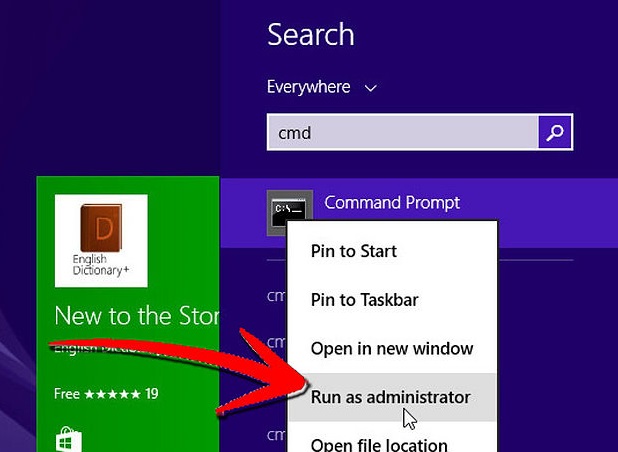
Step 1. Search for Command Prompt. Now run Command Prompt, by right-clicking on it and choosing Run as administrator. If it’s required, insert the password of your Administrator account.
This tutorial will make a bootable USB Flash Drive. Copy the whole disc of your operating system installation. Now you have a portable and bootable USB drive.
Note: Using this method, you can install only the following Windows OS: Vista, 7, 8 or 8.1.

Step 2. Run the Disk Management service. Do it, by writing down diskpart and hit Enter.
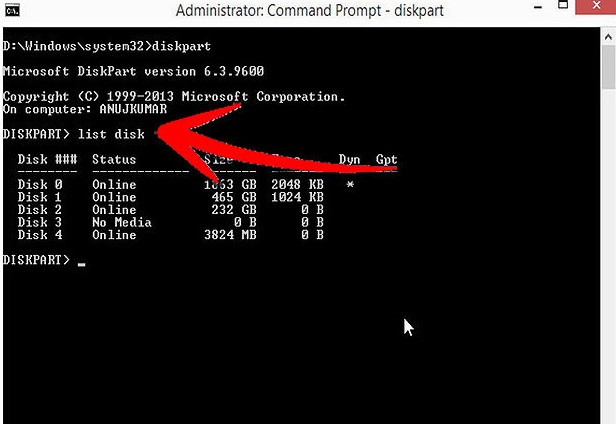
Step 3. List the available disks by running the command listdisk and hit Enter. Now you will be able to see a list of your connected drives on your PC. Your USB Flash drive should be also here. Notice the number of it.

Step 4. Select your USB from the list. Type in select disk [and the number of it without “[” “]” ]. Hit Enter.

Step 5. Clean the USB Flash Drive. Type in the word clean and hit Enter. It will delete all files.
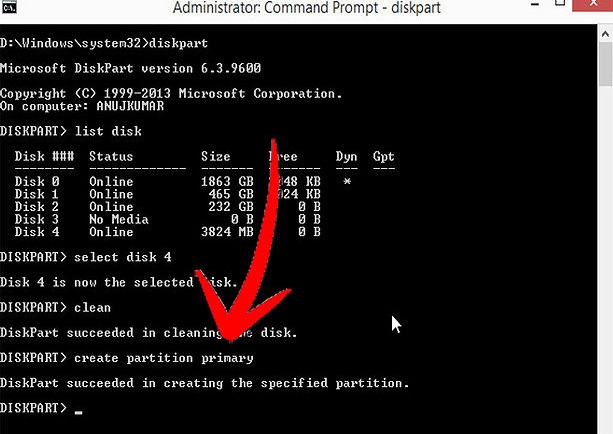
Step 6. Create a primary partition on your USB Flash Drive. Run the command create partition primary. You will be welcomed by the message Diskpart succeed in creating the specified partition.
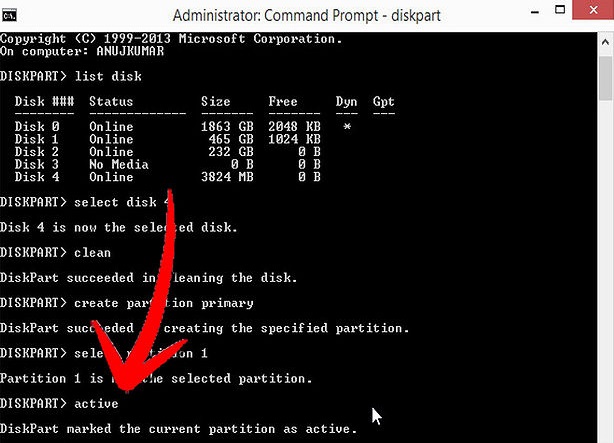
Step 7. Choose the partition. Type in select partition 1 and hit Enter. After this to complete the process, type in active, so you can use it.
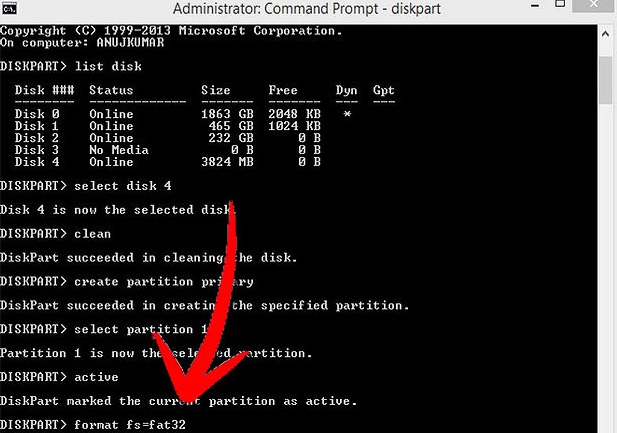
Step 8. Format the USB Flash Drive. Run the command format fs=fat32 and hit Enter.
Note: For small drives it will take only few minutes. For 64Gb USB Thumb Drives it may take hours. So, be patient. If you can’t wait, you may use the command format fs=fat32 quick, but we don’t recommend it.
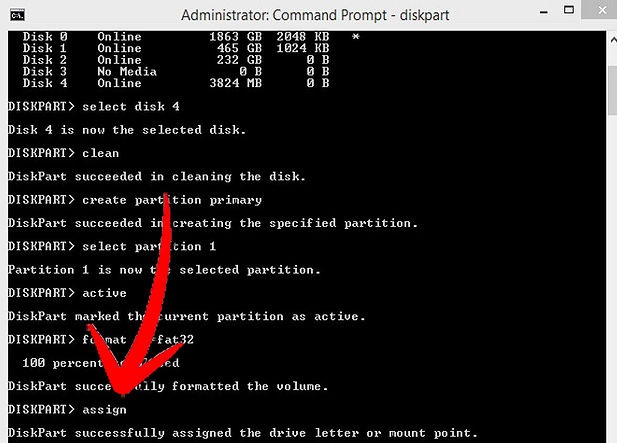
Step 9. Allocate a letter to your bootable drive. Run the command assign and hit Enter.
To exit from Diskpart simply run exit command.
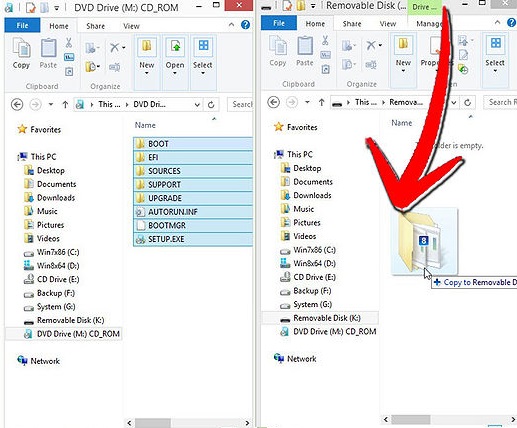
Step 10. Final step. Choose one of the Windows Vista, 7, 8, 8.1 OS and copy the installation files on your USB.
Well done! Now you can enjoy the installation of your manual bootable USB Flash Drive!
2nd Method: Windows Vista & 7 bootable USB Drive Installation
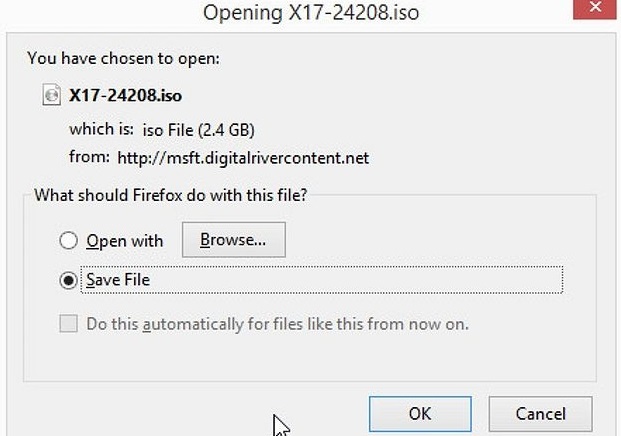
Step 1. Get the .ISO file of Windows Vista / 7 OS (i.e. You may convert it using the UltraISO, PowerISO, DaemonTools… etc. apps. In this tutorial we used UltraISO). Go to the next step if you already have the .ISO file.
- Introduce the Windows disk. Enter into your burning ISO app. Click on the option that will create the image file. Choose your disk with your Windows as a source and wait for converting.

- Be careful to choose a easy-to-find location for your image file. Also, make sure you still have enough space on that hard disk, to run the process properly.
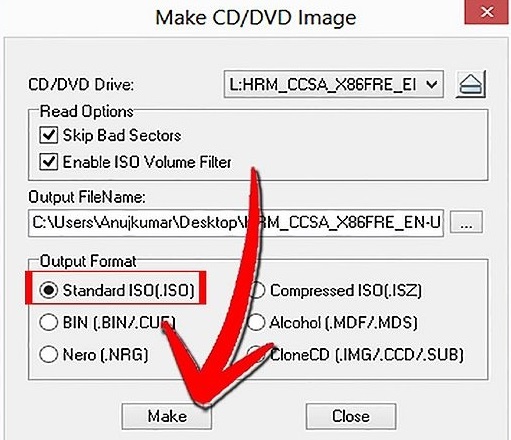
- The speed of converting may take several minutes. It depends of the computer speed and of the Windows Disk drive speed.
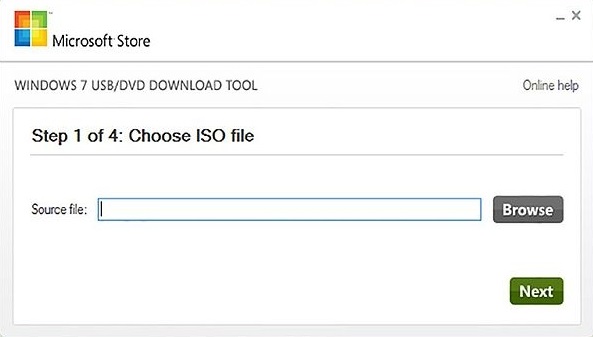
Step 2. Get the Windows 7 USB/DVD app. It’s free and you can download it from Microsoft website. This tool works perfectly with Windows Vista version too. This app can run for all of the Windows versions made by Microsoft.
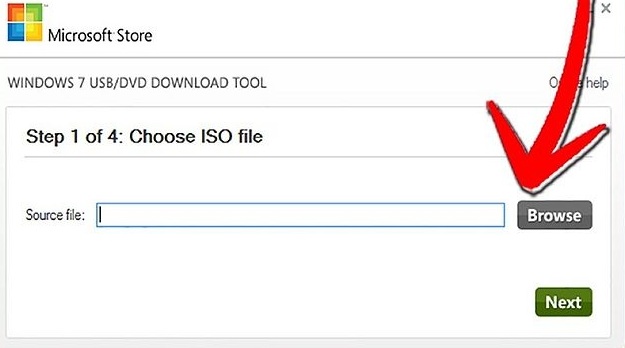
Step 3. Choose the .ISO file of Windows. The file from the first step, which you’ve downloaded or created by yourself.
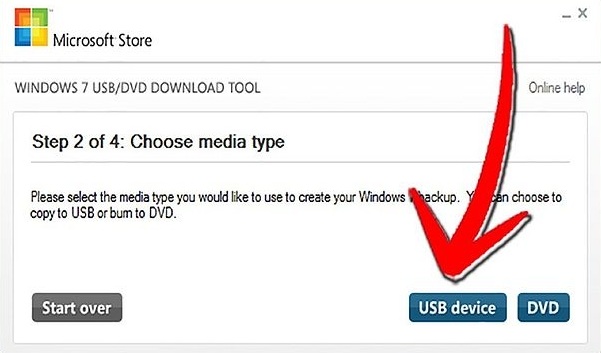
Step 4. Choose the USB Device. You have the possibility to burn a DVD or to make an bootable USB Flash Drive. But for now, we go with USB Device.
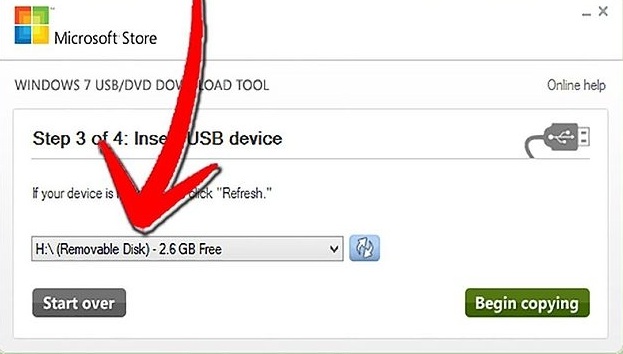
Step 5. Select your USB Drive. Now that you have already selected the USB device solution, make sure that your >4GB USB Flash Drive is correctly connected.

Step 6. Wait several minutes. Until the process ends, take your time. The USB will be formatted, then the .ISO file will be copied on it. According to the performance of your computer, this process may take about 15 minutes.
3rd Method: Make Bootable USB Of Windows XP
Step 1. Install the additional softwares. Here you can download the softwares: USB_Prep8 and Bootsect (click on the name of the files to download them). Be sure that you have an >1GB USB Flash Drive to install Windows XP and the CD/DVD with it.
- Insert the Windows XP disk and also your USB Flash Drive.

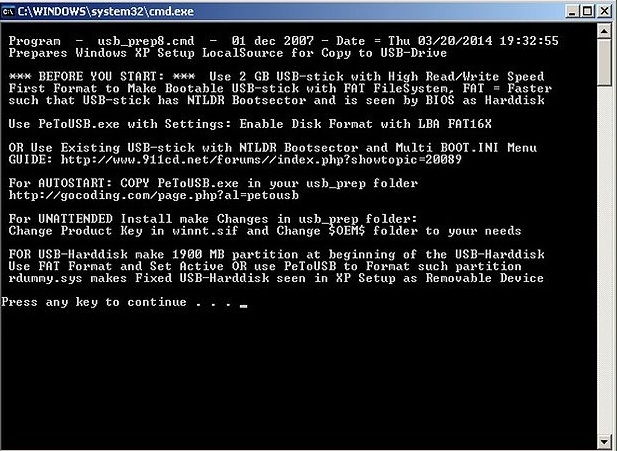
Step 2. Unarchive and open USB_Prerp8. Enter in the folder with the same and double-click on usb_prep8.cmd. A black screen with cmd will appear. After your press any key, this process will format your USB Flash Drive. You may want to install Windows 7. In that case, right-click on the usb_prep8.cmd file and choose “Run as administrator”.
Step 3. Begin the formatting process. Do not change any setting in the window that has just appeared. After all is done all you have to do is to open a new CMD window by writing “CMD”, after you’ve pressed the next keys: Windows + R.
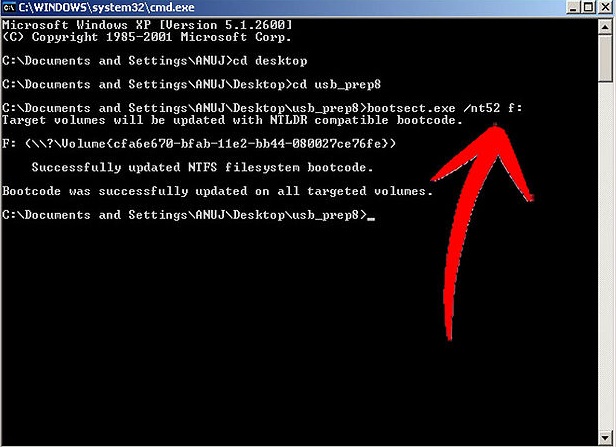
Step 4. Unarchive bootsect file. Now, using command prompt window, navigate to the bootsect folder. Once you get there, type it: “bootsect.exe /nt52 Z:”.
Note: Instead of Z: type in the letter of your USB Flash Drive.
- Don’t try to open the files of your USB Flash Drive, at this moment every operation will cause damage to it.
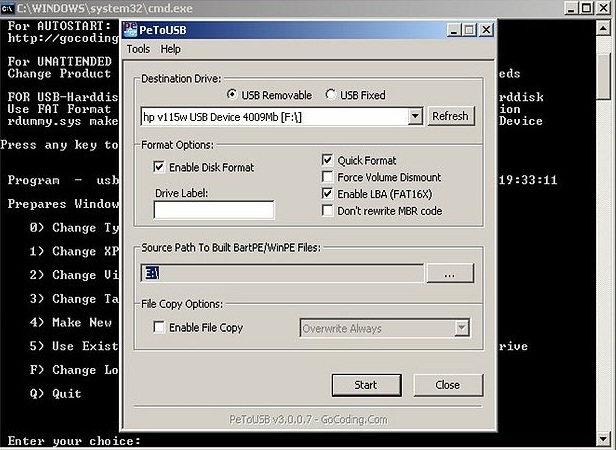
- The Bootsect app will make your USB bootable. Wait several moments. When you will get “Bootcode was successfully update an all targeted volumes” message, exit that window and also PeToUSB. Keep the Usb_prep8 open!
Step 5. Configure the Usb_prep8. Change the first three settings that appear in your Prep8 menu window.
- Type in 1. Hit Enter Key. Browse in and choose the disk of the Windows XP. Hit OK button.
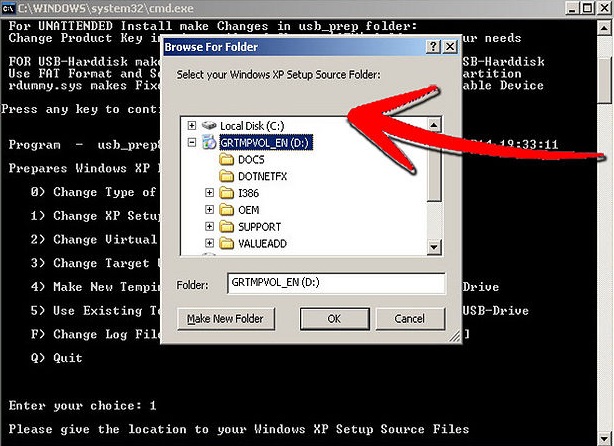
- Type in 2 and hit Enter. Choose a free letter. In our case, we have selected T. It’s very important to be a free drive.

- Type in 3 and hit Enter. Specify the USB drive letter.


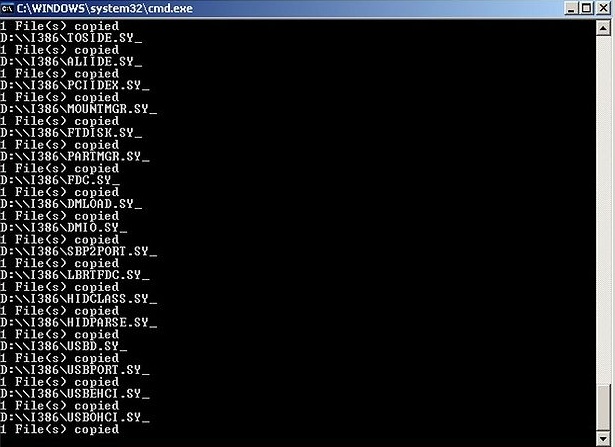
Step 6. Copy the Windows files. Type in 4 and hit Enter. Pres Y to continue. Your USB Flash Drive will be formatted. After this, hit a key to go to the next step.
- You have to wait several minutes, around 15 to copy all the files you need to make this USB a Bootable USB. At a time you have to press a key to permit the process to continue and pres Yes for the next 2 windows that will appear.
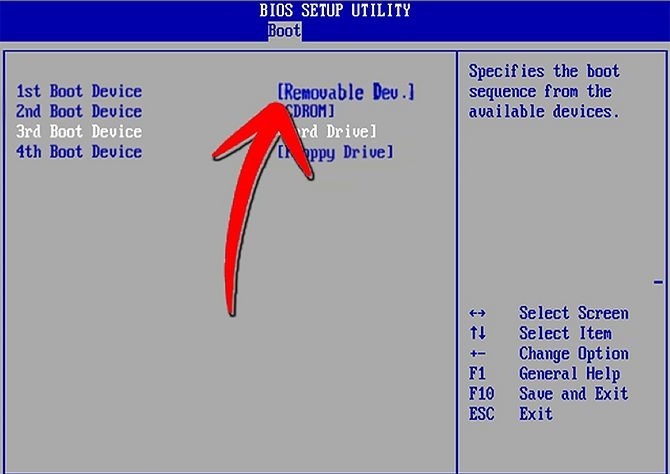
Step 7. Start the Setup. Be assured that your USB is connected to your computer. Open/restart it. If the installation process doesn’t start, enter in BIOS and choose the boot settings. Rise up the USB on the first position. Save settings and restart your computer. Enjoy your Windows XP installation.
4th Method: Use Your Bootable USB As Repair Toolkit

Step 1. Get the .ISO file from the Ultimate Boot CD. Completely free for the download, this app is a collection of softwares that helps your operating system before it is loaded. To make a bootable usb with this software, you will also need Universal USB Installer. By a simple search on google, you will find both apps. Download both of them into the the directory.

Step 2. Open Universal USB Installer. Hit browse button, and choose the Ultimate Boot CD. Now select the USB drive Letter. Hit Create button.
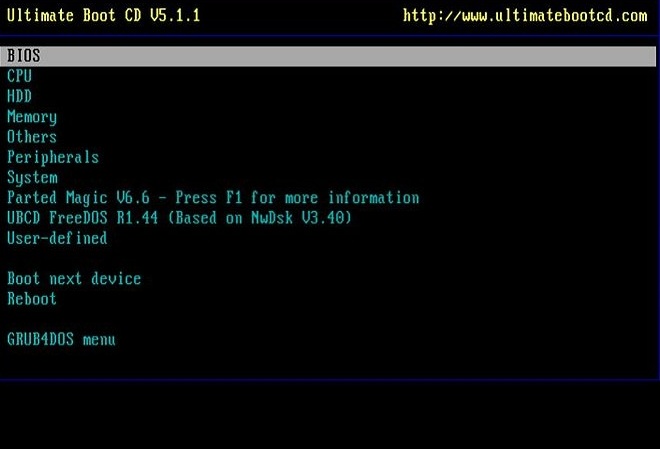
Step 3. USB Flash Drive ready to boot. Ready for use. Restart your computer with USB plugged in. Start your Repair Tool.
5th Method: Make a Bootable USB with Mac OS X 10.7 or 10.8 USB
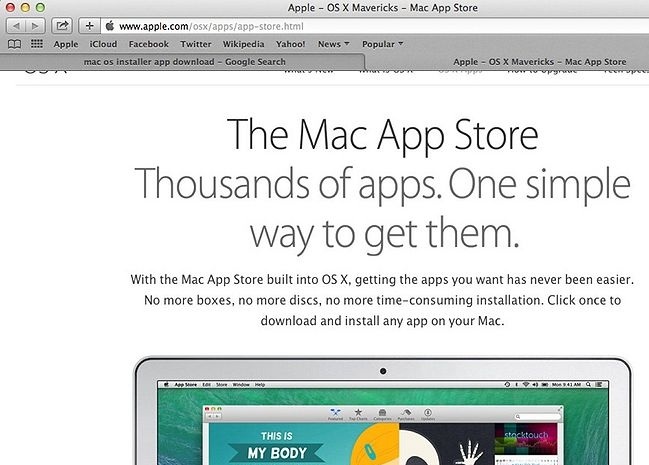
Step 1. Get the USB and software all together. That means you will have to get an >8GB USB drive and also the OS X installer application which you can download from Mac Store. After you get the app, plug in your USB Flash Drive.
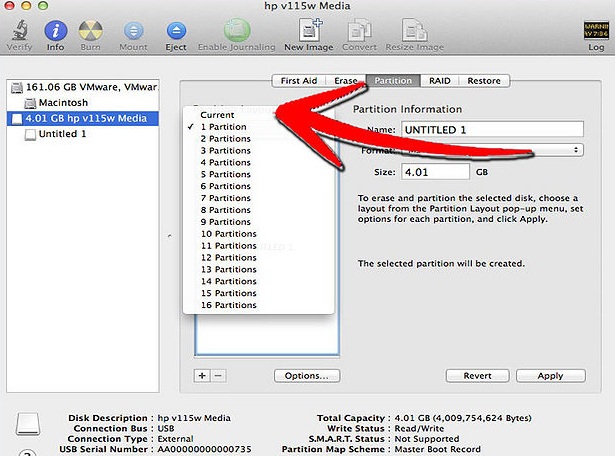
Step 2. Run the app Disk Utility. Inside the Applications directory, you will find it. Choose the USB Flash Drive from the left side and choose Partition. Choose 1 Partition.
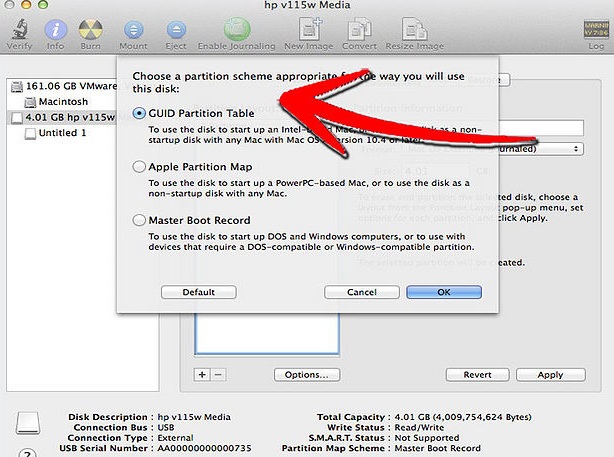
Step 3. Specify the format. Choose the Mac OS Extended (Journaled). Your drive will be able to be read by any kind of Mac OS Computer. After you open Options tab, choose GUID Partition Table.
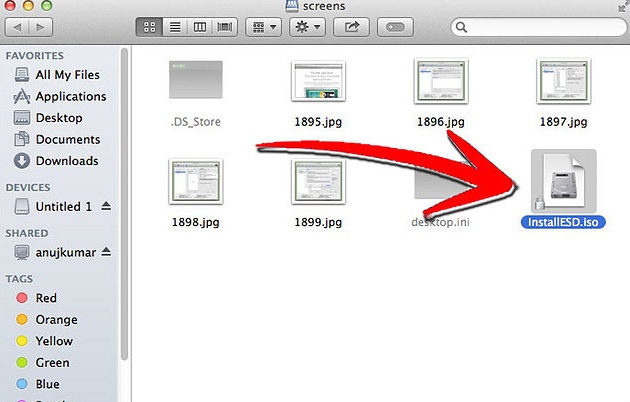
Step 4. Browse in and select Mac OS X file. Find it in the Application folder. That’s the application which you’ve got from Apple Store. Choose Show Package Contents by right-clicking on that file. Enter into Contents and open Shared Support. Drag the file InstallESD.dmg from right to left, on your desktop.
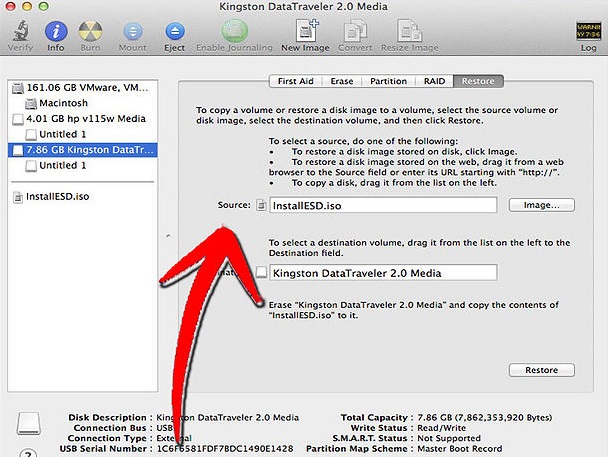
Step 5. Reopen the Disk Utility. Open the Restore by choosing the USB. Choose InstallESD.dmg by opening Image tab. Down below, drag the new partition into Destination blank space.
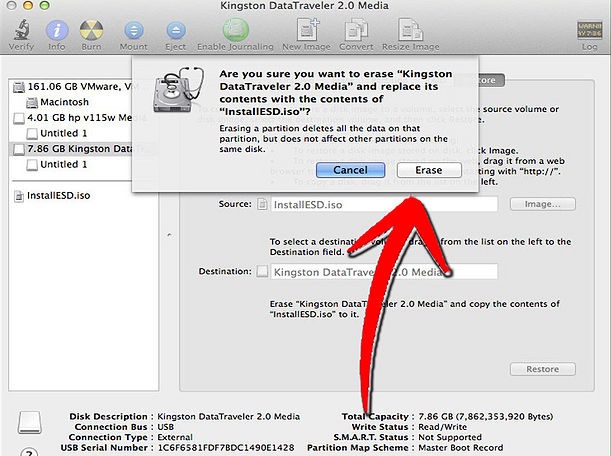
Step 6. Hit Restore. Confirm that you agree with the copy process. Hit enter. Depending on your Mac speed, this process may take about an hour to complete. After this process will finish, you can use confidently your Bootable USB with MAC OS X.
Res,sir i want to learn computer installation & formating
Easy thanks for this
I like sir but now I want to known how can i down formatting my computer window 8
very useful article……
It helped me create a bootable usb drive and boot my system easily
It was all-in-one step by step guide for all platforms. Amazing thanks for your hard work.
Good luck & Keep it up
Thanks david. Really guide me step by step.
Can i install windows 10 using CMD?
You can use usb stick to format it creating bootable USB you can create it using cmd directly without any software to know how to create bootable Usb using cmd visit site. digiwired.blogspot.com
i make my pd bootable through this method this is incridible
do not you think if i copy one version of windows in one usb, in case of having windows.exe , then bootable usb is built to such easy and fast way?
26 10 1395 iran
Formatting (format fs=fat32)will not work for a usb stick with 128 Gb capacity.
Maybe fs=exfat32 will work.
I have a problem with Step 10. Final step. Choose one of the Windows Vista, 7, 8, 8.1 OS and copy the installation files on your USB.
Where are the files?
What are the files necessary ?
This is the hardest part of making a USB drive and you leave it out.
Thanks for sharing very usefull
Easy and good Guides Thank you.
Thanks it helped so much
I have noticed you don’t monetize your website, don’t waste your traffic, you
can earn extra bucks every month because you’ve got high quality content.
If you want to know how to make extra bucks, search for:
best adsense alternative Wrastain’s tools