Assign a Static Drive Letter to a USB Disk in Windows 7
If you have an external USB hard disk or external USB flash drive which is is used for backups or maybe you have installed software’s on it, you may want to have a static letter permanently assigned to it. In this way, each time you connect your device the windows will give that device the same letter.
How it’s done?
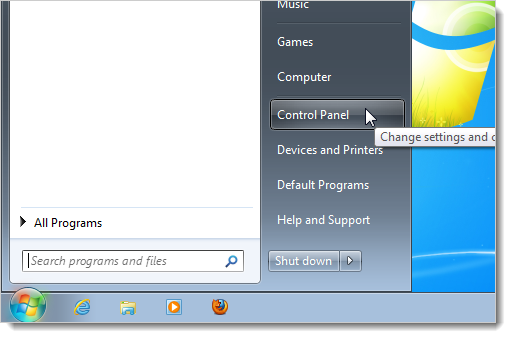
First, open the start menu from windows and select Control Panel.
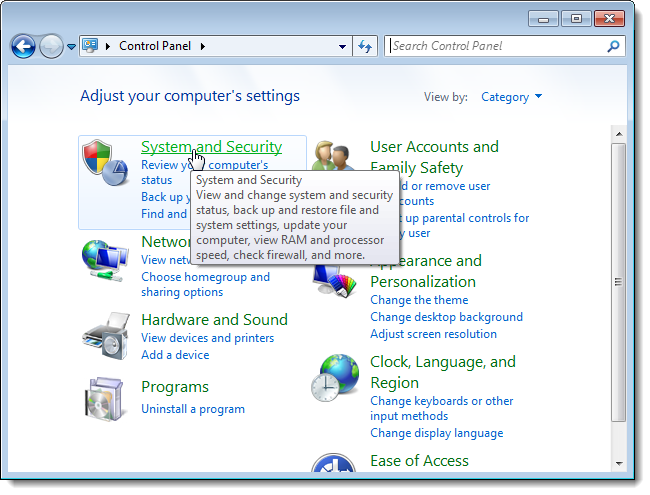
From this panel, click on the System and Security.
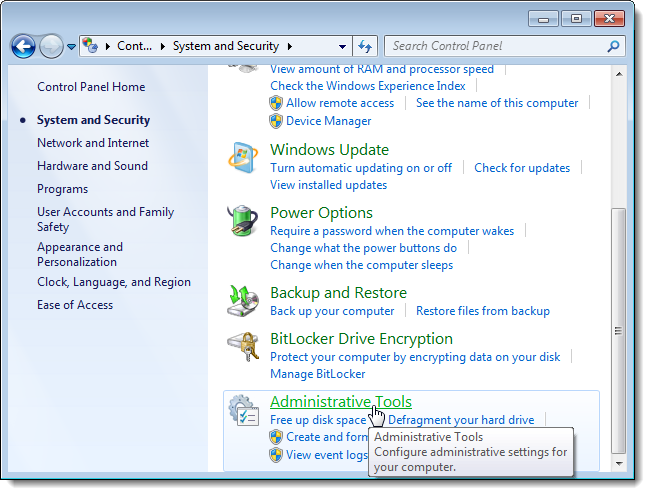
Now, being on System and Security, select Administrative tools from the bottom.
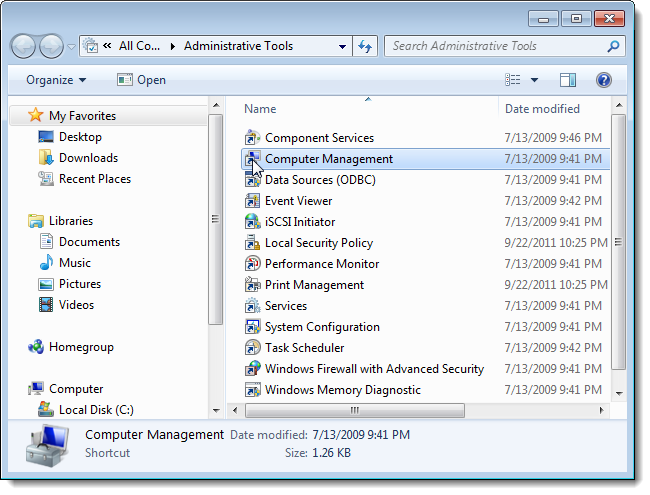
From the new opened window, just open the Computer Management link.
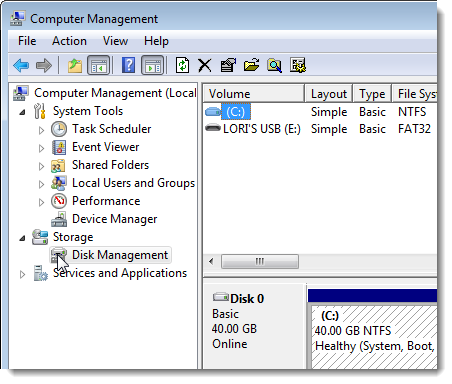
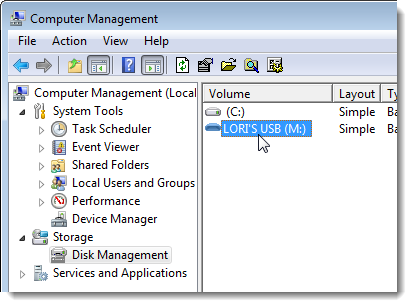
Under the Computer Management, select Disk Management which is located under Storage.
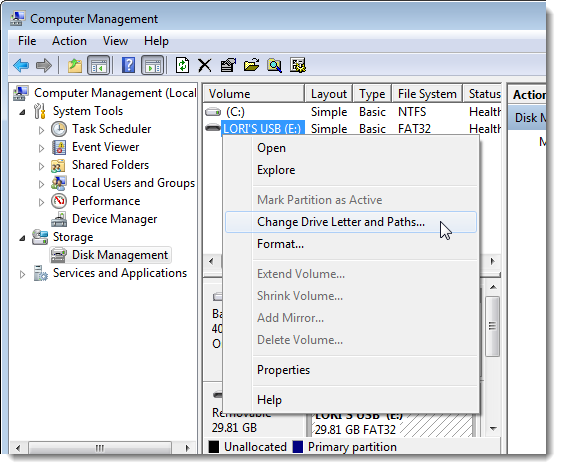
Now you can see all your drives listed in the pane of the middle section with removable drives included. If you wish to change a drive letter for any external USB disk, right click on the desired drive and select from the newly opened window, Change Drive Letter and Paths.
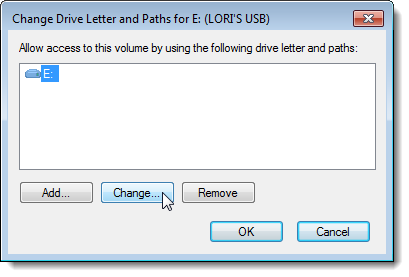
A new window will appear. To change the drive letter of the selected drive, press the Change button
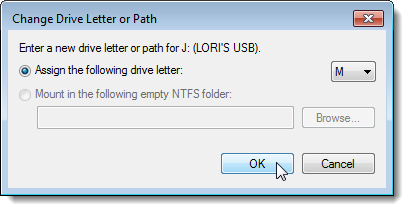
When the new dialog box show up, select the desired drive letter. Please note that is a good thing to select a letter between N and Z. If you choose a letter outside of this interval, a newly installed device may take it. So it’s better to take this into consideration.
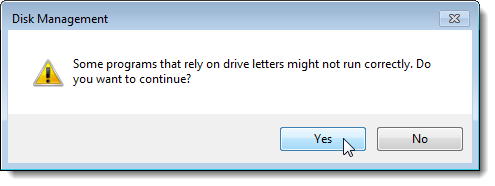
Next an warning will be displayed on the screen. If you have any installed programs on your USB device, make sure that you are going to update their paths according to your drive letter selection from here.
After you clicked the YES button, the new letter will be displayed on your drive in the Computer Management window.
Now, paths used for software installed from now on on your USB disk won’t have to be changed each time when you’ll plug in the USB device. It’s a good way to save some time if you intend to install and keep software on removable devices.

Recent Comments